Wednesday, 11 April 2018

What Custom Android Launchers Are and Why You Might Want to Use One


choose-android-launcher

One of the many ways you can customize your Android home screen is by replacing it entirely. Android developers can create their own software to replace your home screen — Facebook Home is just one of many options.
Most custom Android launchers are currently focused on providing options, changing your home screen’s theme and icons, and generally tweaking the default interface. With Facebook Home’s release, developers may become even more creative in offering alternatives to Android’s home screen.

How Android’s Home Screen Works

When you press the Home button on your Android phone or tablet, you see your home screen, which is filled with the app shortcuts and widgets you’ve placed there. However, unlock on competing mobile platforms like Apple’s iOS and Microsoft’s Windows Phone, the home screen is basically just another app.
When you press your home utton, you can have Android launch a third-party app that behaves as a home screen, replacing the default home screen. Such pieces of software are often referred to as launchers or home-screen replacements.

What Third-Party Launchers Can Do

Third-party launchers replace your entire home screen, which means they can change the home screen as well as the app drawer. For example, launchers could include themes that affect the look of your home screen and the icons in your app drawer. They could change the look and organization of the app drawer entirely, offering categories and different methods of sorting your installed apps. They could change the graphical effects that occur when swiping around, add a variety of options for tweaking the interface just how you like, and change what taps and swipes on your home screen do.android-app-drawer-categories
The above explanation describes how most third-party launchers currently work, anyway. Facebook Home goes in a different direction by using its control over your home screen to eliminate widgets and place app icons aside, focusing on the latest content from your Facebook friends. Other third party launchers could do similar, moving further away from the standard “home screen with widgets plus app drawer” interface.
nova-launcher-settings

Using Custom Launchers

After installing a custom launcher from Google Play, tapping the Home button will bring up an app chooser. You can select your new home screen and tap Just onceto use it once, or tap Always to make it your new default home screen that appears whenever you tap the Home button.
android-select-default-launcher[4]
You’ll see this option again whenever you install a new custom launcher, allowing you to select your preferred app.
To get the default launcher back, go into the Settings screen, tap Apps, tap your current launcher in the list of installed apps, and tap the Clear defaults button.
android-reset-default-launcher

Example Home Screen Replacements

Here are a few of the more interesting third-party launchers available for Android:
  • Facebook Home – Facebook Home is very different from most home screen replacements. Most custom home screen replacements are for tweakers and replace Android’s home screen with an interface supporting many more options and themes. In contrast, Facebook Home goes a different direction and replaces your device’s home screen with content from your Facebook friends. It’s a good example of just how flexible Android’s interface is, and we may see more interfaces like it from other developers — Twitter has recently indicated a possible interest in releasing its own home screen replacement for Android.
  • Nova Launcher – Nova Launcher supports Android 4.0 and above. It looks similar to Android’s default launcher, but adds a variety of additional options and effects, including the ability to use themes and create custom tabs to categorize the apps in your app drawer. Because it’s so similar to the default interface, it can be installed on a Samsung, HTC, or other manufacturers’ device and set as the default launcher, replacing the manufacturer’s Android skin with a a more stock Android-like experience.
  • Holo Launcher – Holo Launcher works like Android 4.0’s default interface, but it also works on Android 2.2 and above. Holo Launcher can be used to get a more modern-looking home screen on devices running older versions of Android, making an old Android feel like new.
  • GO Launcher EX – GO Launcher EX supports over 5000 themes and its own GO widgets, as well as many included effects and options. If you want something that looks a bit different, you may want to give this a try.
  • Launcher 8 – Launcher 8 offers a Windows Phone 8-like layout for your home screen. It’s another good example of Android’s flexibility, although it won’t be as slick and integrated as a real Windows Phone experience.
launcher-8-on-android

Facebook also recently introduced “chat heads,” floating chat windows that appear above any other app you’re currently using. However, chat heads aren’t the only floating app available for Android. We’ve covered a variety of floating apps you can use on any Android device for everything from chatting to taking notes, browsing the web, and watching videos.
Read More

How to Set Default Apps on Android


IMG_8822
When you have multiple applications that do the same thing—like browsers, for example—Android will ask you which one you want to use every time, at least until you set one as the default with the “always” action. In the earlier days of the app picker, you’d have to clear defaults for each one before applying another, but things have changed.
Now, there’s a simple way to manage default applications for the most-used apps all in one place. The only problem is that it’s in a different place for every major manufacturer. Just Android things, right?
The good news is that getting to where you need to be starts in the same place on basically every Android device out here: Settings. Just pull down the notification panel, and hit the cog icon to jump in.
Screenshot_20160628-205140 Screenshot_2016-06-28-21-45-46
Once in Settings, you’ll need to find the Apps section for your particular manufacturer. On most devices, it’s just labeled “Apps” or “Manage Apps,” with the main exception being Samsung Galaxy handsets—you’ll be looking for “Applications.” Silly Samsung, being all formal. On LG devices, you’ll find “Apps” under the “General” tab.
Screenshot_20160628-205149 Screenshot_20160628-204829 Screenshot_2016-06-28-20-46-40
From here, things can get a little sketchy between brands. On Stock Marshmallow devices, just hit the cog icon in the top right corner, then “Default Apps.” This changes in Android N, as there is no “Default Apps” option—instead, everything is managed from the main app settings screen. On Galaxy devices, the second option to the top is “Default applications,” which is the one you want.
Screenshot_20160628-205154 Screenshot_20160628-204838
On LG handsets, hit the overflow button in the top right corner, then “Configure apps.” On Huawei phones, tap “Default app settings” at the bottom of the screen.
Screenshot_2016-06-28-20-46-58 Screenshot_2016-06-28-20-50-00
At this point, most handset makers should be pretty much on the same page. The majority will let you change the default launcher (Home), browser, dialer (phone), and SMS apps, along with some particulars that will vary between manufacturers.
Screenshot_20160628-204846 Screenshot_2016-06-28-20-58-06 Screenshot_2016-06-28-20-50-07

It’s worth mentioning here that whenever you install a new app that can be set as a default—like a launcher or browser—this will effectively reset your default preference for that category, allowing you to set the newly-installed app as default without having to go through much hassle. If you want to change it back, just following these instructions. Simple.
Read More

How to Hide Apps from Android’s App Drawer with Nova Launcher


IMG_8113
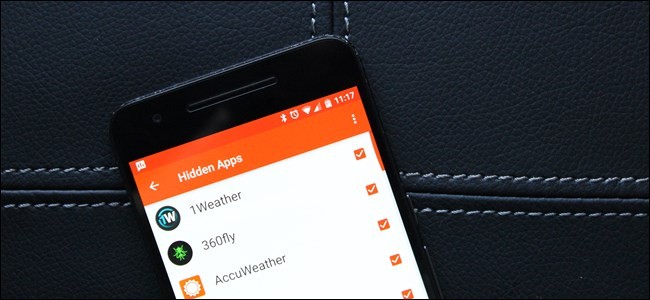
Not every app deserves a spot in your app drawer. Maybe there are some built-in apps you don’t use, or a few you don’t want others to see. Here’s how to hide apps from your app drawer with Nova Launcher.
Of course, you can always uninstall apps you don’t want–even if they’re “uninstallable” bloatware. This is more for apps you use in the background, or want on your phone, but don’t want to see cluttering up your list of icons

How to Hide Apps In Nova Launcher

If you already have Nova Launcher installed and set up, hiding apps in the drawer is incredibly simple. Note that you’ll need Nova Launcher Prime ($4.99) for this feature. This will only hide apps in the drawer, so you can still put the app on your home screen before hiding it in the drawer and quickly launch it from there if you want.
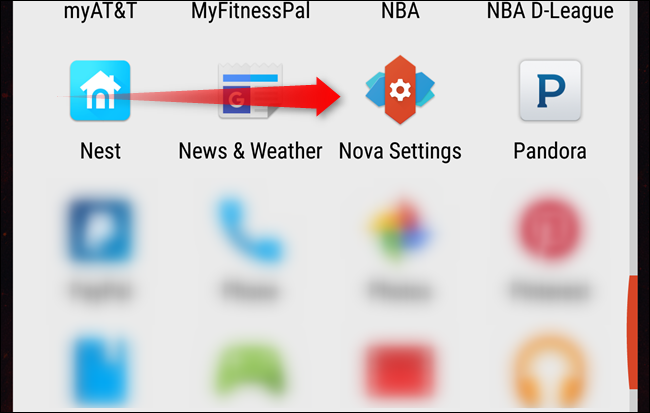
First, jump into Nova’s settings menu, by either long-pressing on the home screen and selecting the “Settings” icon in the bottom right, or heading into the app drawer and tapping the “Nova Settings” icon.
Screenshot_20160331-102336 Screenshot_20160331-102326
From there, tap the second entry in the menu—”App & widget drawers.”
Screenshot_20160331-112639
There are several options here, but you’re going to want to scroll all the way to the bottom. In the “Drawer groups” section, select the “Hide apps” option.
Screenshot_20160331-102502
Then, select all the apps that you’d like to hide by ticking the check box next to the app’s name.
Once you’ve finished selecting all the apps you’d like to hide, either back out of this menu with the arrow in the upper left, or just hit the home button to go back to the home screen.
Screenshot_20160331-102614
You’re done—all the selected apps will no longer be visible in the app drawer.

How to Access Apps Once They’re Hidden

If you don’t have the app icon on any of you home screens, then you’re probably wondering what to do if you need to access it. You could jump back into the above menu and unhide the app, but that’s cumbersome. Fortunately, there are a couple of ways to launch an app once it’s been hidden.

Access a Hidden App from the Search Bar

If you’re using the Android Marshmallow-style app drawer in Nova, pulling down while in the drawer will launch the search bar and “Recently install or updated” app menu. Even though the app icon isn’t shown in the drawer, you can search for the app and launch it that way. Easy peasy.
Screenshot_20160331-103305

Access All Your Hidden Apps at Once

If you’d prefer a way to show all your hidden apps, there’s also a quick and painless way to do that—but you’ll need to enable Nova’s tabbed app drawer interface first.
To do this, jump back into Nova’s Settings menu, then tap the “App & widget drawers” option again.
Scroll about three-quarters of the way down the menu, till you see the “Tab bar” section. Enable the Tab bar by sliding the toggle to the right. It turns orange when it’s activated; gray when it’s not.
Screenshot_20160331-104029
You can also change the Tab Style here using the entry just below the Tab Bar option—the default should be “Colorblock,” but I generally opt to swap that to “Material,” just because it looks cleaner and more minimal.
Screenshot_20160331-104039
Once the Tab Bar has been enabled, you can exit this menu and head back to the home screen.
Back in the app drawer, you’ll notice a new feature at the top: a tab that should read “Apps.” If you long-press this tab, a small menu will appear with two options: “Show hidden apps” and “edit.”
Screenshot_20160331-104008
Toggle the “Show hidden apps” option to instantly make your hidden apps visible. A small asterisk will appear next to the word “Apps” to denote that hidden apps are currently being shown.
Screenshot_20160331-104014
Repeat the same process to hide your apps again, this time unticking the check box.

It’s worth mentioning that this shouldn’t be used as a method of security. There are still very simple ways to access hidden apps (not limited to the methods mentioned here), so this isn’t really a proper solution to keeping private data safe. But it’s a great way to reduce clutter or hide icons you don’t want to see.
Read More

Seven Things You Don’t Have to Root Android to Do Anymore

For years, Android enthusiasts have been rooting their devices to do things that Android doesn’t allow by default. But Google has added many features to Android that once required root, eliminating the need for many people.
And with every major release of Android, the list of reasons to root a device is getting shorter and shorter—what used to be a requisite reasons for rooting is often an included feature at this point. Here are some of the top examples.

Take Screenshots

You could always take screenshots by connecting your Android smartphone or tablet to your computer, but taking screenshots on your device was once a privilege reserved only for root users. It seems like this was an eternity ago, and if you’re not a lifelong Android user, you may not even be aware there was a time when screenshots required a rooted device. Crazy, right?
But now, it’s simple: press volume down and power at the same time to take a screenshots (or the home button and power on Galaxy devices with physical buttons). And poof—a screencap ready to share with the world. I honestly still can’t believe this was ever not a native function.

Disable Preinstalled Apps

Look, no one likes bloatware. But once upon a time, your personal feelings on the crap your manufacturer or carrier wanted you to have on your phone didn’t matter. You were stuck with it, unless you rooted your handset.
Now, however, you can easily disable preinstalled applications right from Android’s settings. This is particularly useful for the aforementioned bloatware situation, though it’s possible some manufacturers may disable this feature on their devices. That’s an unfortunate downside of such an open operating system. The good news is that it doesn’t seem to be common practice for most major Android OEMs at this point.
To disable a preinstalled application, open Android’s Settings screen, select Apps, and flick over to the All category (this is the default view on Oreo handsets). Tap the app you want to disable in the list.
If you can’t uninstall the app, you’ll see a Disable button where the Uninstall button would be. Tap the button to disable the app. The Disable button may not be available for some essential packages that are part of the Android OS, but you can disable default apps like the Calendar, Gallery, and Clock. You can even disable Android’s built-in keyboard (though we wouldn’t).

Revoke Permissions

This is one area where Android has made very large strides over the last several versions. Once upon a time, you had no control over what apps were allowed to do on your phone and with your information. Since then, it’s evolved to have a bit more broad control, and now incredibly granular control.
Because controlling permissions is so granular now, it’s a little more in depth than just a “click here, then here, then here.”

Restrict Cellular Data

With Android’s built-in tools, you can restrict specific apps from using the cellular data connection in the background. It’s not quite a firewall that blocks network access for specific apps, but it’s still useful.
To take advantage of this feature, go into the Settings menu and select Data usage (on Oreo, you’ll find Data Usage in the Networks & Internet menu). In addition to setting data limits, viewing charts, and disabling mobile data entirely, you can tap a specific app and uncheck the “Background Data” option to prevent the app from using mobile data in the background. The app can still use data if you open it, and can still use data on Wi-Fi networks, but it won’t be able to use the cellular data connection in the background.
You can also tell Android to treat specific Wi-Fi networks like they’re cellular networks. To do this, tap the “Network restrictions” option under the Wi-Fi subsection in the Data Usage menu, then set the Wi-Fi network as “Metered.” This essentially tells Android to restrict data on this network in the same way it does on cellular networks. Super granular control!

Encrypt Device Storage

Android includes built-in encryption support, allowing you to encrypt your smartphone or tablet’s entire storage. When you power it on, you’ll have to enter its encryption password—if you forget this password, you’ll have to perform a factory reset and lose all your data. If your device is stolen, the thief will need your credentials to decrypt it and access your data (assuming it’s powered off).
To encrypt your Android smartphone or tablet, go into it Settings screen, tap Security, and tap Encrypt tablet or Encrypt phone. It’s worth noting that this process will take a while to complete and once it’s done, it’s done. You won’t be able to undo the encryption without a factory reset.

Connect to VPNs

If you want to connect your Android to a virtual private network—say, your work VPN—you don’t need to root it and install a VPN client like you once did. Hooray for innovation!
Some VPNs may have their own standalone apps, but ifyours doesn’t, you can go into the Settings menu, tap More under Wireless & Networks, and tap VPN. You’ll be able to add and edit multiple VPN profiles. On Oreo, you’ll find the VPN option in the Network & Internet menu.

Restart Your Phone With One Tap

Once upon a time, you had to either turn your phone off and back on again manually, or you had to root to restart it with one tap. Honestly, it’s a stupid thing, but man what a difference it makes—I can’t tell you how many times I turned my phone off to restart it and forgot to turn it back on before this feature became commonplace.
I’m sure you already know how to do this: long-press the power button to bring up the menu, then tap restart. It’s easy.

While there are still some things you can only do by rooting your Android, Google’s doing a good job of adding features to the Android OS where they make sense.
Read More

10 Android Tweaks That Still Require Root


Many features that once required root have been added to Android over the years. However, many advanced tricks still require rooting your Android smartphone or tablet.
In an ideal world, you wouldn’t have to root — rooting reduces your device’s security. That’s part of why CyanogenMod’s founder is looking at adding additional features to Cyanogenmod that would eliminate the need for root.

Back Up and Restore App Data

The popular Titanium Backup app, which allows you to back up an app’s data and then restore it later, requires root access. Android apps aren’t supposed to be able to read other apps’ data — that’s a security vulnerability — so this still requires root access. Much Android data is automatically backed up, but Titanium Backup allows users to back up everything and easily restore it, even data that wouldn’t normally be backed up.
Android includes some built-in backup features, but they’re hidden — you have to access them by plugging your device into a computer and running a special command. While the built-in backup features are so hidden and not all app data is backed up to the cloud, Titanium Backup is still very useful.

Change Your DNS Server

Want to change your Android phone’s DNS server and use a third-party DNS server like Google Public DNS for possibly improved speed, OpenDNS for web filtering, or Tunlr for easy access to geoblocked online media services?
Android doesn’t make this easy. You can change the DNS server for each individual Wi-Fi network you connect to, but you can’t set a preferred DNS server system-wide. This requires a third-party app like SetDNS. Sure, you could just change the DNS server on your router and you’d be okay when you were at home, but this wouldn’t help you when you were out and about. Android make this possible without rooting, but it’s extremely tedious.

Remove Bloatware Completely

Android now provides a way to disable apps that were preinstalled by the carrier or device’s manufacturer. However, they’ll just be disabled — so they’ll still take up space on the device’s storage. With root access, you can delete the applications from the system partition, recovering the wasted storage and gaining the ability to use it for other things.
This isn’t necessarily recommended, as it can cause problems if you remove apps that the device needs. That’s why disabling bloatware apps is generally a better idea — but that’s little comfort if you don’t have much storage space left and you want to recover space wasted by bloatware.

Gain Low-Level Hardware Access

After rooting your device, you can install a custom Linux kernel on it. This enables you to access features that require kernel-level changes. For example, Nexus 4 users can install the Touch Control app to wake their smartphones with a simple swipe on the display rather than a press often power button. This is implemented as a kernel module because it requires that low-level access.
Other commonly used features that often require custom kernels include display calibration, CPU downclocking (for more battery life), and CPU overclocking (for more performance.)

Manage App Permissions

When you install an app, Android shows you the permissions the app requires. This is a take-it-or-leave-it offer — if you want to install a game but that game requires an obscene level of permissions, you can’t just deny individual permissions.
Root access allows you more control over app permissions on your phone, as this feature isn’t available to typical users. The good news is that Android 4.3 includes a hidden permissions manager named “App ops.” This feature likely isn’t stable and shouldn’t be relied on yet, but it’s hopefully a sign of things to come — with any luck, we’ll see a stable permission manager introduced in Android 4.4.
android-app-ops

Mount USB Sticks

It’s possible to connect a USB stick to your Android tablet using a standard USB OTG cable. However, Android doesn’t support USB sticks natively. If you’d like to connect a USB stick to your tablet so you can watch videos without wasting all your tablet’s storage, you’ll need root access and something like the StickMount app. This utility makes files on USB sticks available on the Android device’s file system so other apps can access them, but it requires low-level access available only to root users.

Get Full File System Access

Root gives you full access to the system by definition, so it’s no coincidence that people who want full read/write access to the entire file system will require root. Root allows you to use file managers that can access the entire file system and even edit Android’s configuration files by hand in text editors — something hardcore Android tweakers may find useful.

Automate More Things

We’ve previously covered Tasker, an advanced application that lets you automate your Android device. Tasker allows you to make things automatically happen when certain conditions are met. However, some features you can change yourself require root access when controlled by an application. If you want to enable or disable airplane mode, connect or disconnect VPNs, or do other advanced things that Android doesn’t allow apps to do, you’ll need to give Tasker root access.

Stream To Apple AirPlay Devices

The AirAudio app makes Android devices AirPlay-compatible, allowing you to stream audio from your device to an AirPlay-enabled receiver like an Apple TV. AirAudio does this by capturing the audio data coming from an application and sending it over the network. Android doesn’t normally allow apps to listen to other app’s audio signals, so AirAudio requires root access to do its thing.
This is an example of the sort of unforeseen app that’s only possible because root allows the app to break out of Android’s security model.

Adblock

We’re obviously an ad-supported website, so we generally don’t jump up and down telling everyone how to disable ads. However, it’s impossible to deny — one big reason many people root their devices is to block ads at the system level.
Many Android apps are free specifically because they contain ads, so using a trick to disable advertisements in the app when you could just spend $0.99 for the full, ad-free app isn’t very nice to developers. Don’t expect Google to make this feature stop requiring root anytime soon.

This isn’t a comprehensive list, but it gives you an idea of some of the most common reasons for rooting. Wi-Fi tethering doesn’t necessarily require rooting anymore, either — even if the carrier has disabled the built-in tethering features, most devices can use Wi-Fi tethering via the FoxFi app.
Read More

Android is Based on Linux, But What Does That Mean?

android-linux
Android may be based on Linux, but it’s not based on the type of Linux system you may have used on your PC. You can’t run Android apps on typical Linux distributions and you can’t run the Linux programs you’re familiar with on Android.
Linux makes up the core part of Android, but Google hasn’t added all the typical software and libraries you’d find on a Linux distribution like Ubuntu. This makes all the difference.

“Linux” vs. The Linux Kernel

The big difference here comes down to what we mean by Linux. People use the term “Linux” to mean many different things. At its most basic, Linux means the Linux kernel. A kernel is the core part of any operating system.
We also refer to Linux distributions as simply “Linux.” However, Linux distributions aren’t just the Linux kernel. They contain many other pieces of software, such as the GNU shell utilities, Xorg graphical server, GNOME desktop, Firefox web browser, and so on. That’s why some people think the term GNU/Linux should be used for “Linux distributions” like Ubuntu, Mint, Debian, Fedora, Arch, openSUSE, and others.
Android uses the Linux kernel under the hood. Because Linux is open-source, Google’s Android developers could modify the Linux kernel to fit their needs. Linux gives the Android developers a pre-built, already maintained operating system kernel to start with so they don’t have to write their own kernel. This is the way many different devices are built — for example, the PlayStation 4 uses the open-source FreeBSD kernel, while the Xbox One uses the Windows NT kernel found in modern versions of Windows.
You’ll even see the Linux kernel version running on your device under About phone or About tablet in Android’s Settings.
linux-kernel-version-on-android-about-screen

The Differences

There’s some debate over whether Android qualifies as a “Linux distribution.” It uses the Linux kernel and other software, but it doesn’t include much of the software Linux distributions normally include.
When you boot an Android device, the Linux kernel loads just like it would on a Linux distribution. However, much of the other software is different. Android doesn’t include the GNU C Library (glibc) used on standard Linux distributions, nor does it include all of the GNU libraries you’d find on a typical Linux distribution. It also doesn’t include an X server like Xorg, so you can’t run standard graphical Linux applications.
Rather than running typical Linux applications, Android uses the Dalvik virtual machine to essentially run applications written in Java. These applications are targeted at Android devices and the application programming interfaces (APIs) Android provides rather than being targeted at Linux in general.
android-architecture

Why You Can’t Run Desktop Linux Software on Android?

Because Android doesn’t include a graphical X server or all the standard GNU libraries, you can’t simply run Linux applications on Android. You have to run applications written specifically for Android.
Android does have a shell like the one you’ll find on Linux. There’s no way to access it out-of-the-box, but you can install an app like Android Terminal Emulator to gain access to this terminal environment.
By default, there’s not much you can do here. The terminal will still run in a restricted environment, so you can’t gain a full root shell without rooting your Android device. Many standard commands you might need aren’t available — that’s why people who root their device generally install the BusyBox application, which installs many command-line utilities. These utilities are used by applications to do things with their root access.
android-terminal-emulator-uname

Why You Can’t Run Android Software on Desktop Linux

Linux doesn’t include the Dalvik virtual machine, so it can’t run Android apps. The Dalvik virtual machine and all of Android’s other software can’t simply be dropped onto a desktop Linux machine — you’d have to do more work to make Android apps output to a window on a standard desktop through Xorg, for example. Theoretically, with enough work, developers could make Dalvik run on desktop Linux so desktop Linux users could run Android apps on their desktops. The now-dormant Ubuntu for Android product attempted to do something like this, integrating Ubuntu and Android on a phone and allowing those Android apps to run on Ubuntu’s desktop.
BlueStacks and other Android app emulators attempt to do this for Windows and Mac. They run Android on virtual hardware in a virtual machine, allowing them to run Android apps — with a performance penalty — on your desktop. These solutions haven’t proven very popular, though.
apk-on-desktop-linux

Google’s Chrome OS is also based on Linux. Like Android, Chrome OS doesn’t provide a standard X window system, so standard Linux applications can’t run on Chrome OS. Unlike Android, Chrome OS is closer to standard desktop Linux distributions so you can use developer mode to install the missing Linux desktop software.
Read More