Wednesday, 11 April 2018

What Custom Android Launchers Are and Why You Might Want to Use One


choose-android-launcher

One of the many ways you can customize your Android home screen is by replacing it entirely. Android developers can create their own software to replace your home screen — Facebook Home is just one of many options.
Most custom Android launchers are currently focused on providing options, changing your home screen’s theme and icons, and generally tweaking the default interface. With Facebook Home’s release, developers may become even more creative in offering alternatives to Android’s home screen.

How Android’s Home Screen Works

When you press the Home button on your Android phone or tablet, you see your home screen, which is filled with the app shortcuts and widgets you’ve placed there. However, unlock on competing mobile platforms like Apple’s iOS and Microsoft’s Windows Phone, the home screen is basically just another app.
When you press your home utton, you can have Android launch a third-party app that behaves as a home screen, replacing the default home screen. Such pieces of software are often referred to as launchers or home-screen replacements.

What Third-Party Launchers Can Do

Third-party launchers replace your entire home screen, which means they can change the home screen as well as the app drawer. For example, launchers could include themes that affect the look of your home screen and the icons in your app drawer. They could change the look and organization of the app drawer entirely, offering categories and different methods of sorting your installed apps. They could change the graphical effects that occur when swiping around, add a variety of options for tweaking the interface just how you like, and change what taps and swipes on your home screen do.android-app-drawer-categories
The above explanation describes how most third-party launchers currently work, anyway. Facebook Home goes in a different direction by using its control over your home screen to eliminate widgets and place app icons aside, focusing on the latest content from your Facebook friends. Other third party launchers could do similar, moving further away from the standard “home screen with widgets plus app drawer” interface.
nova-launcher-settings

Using Custom Launchers

After installing a custom launcher from Google Play, tapping the Home button will bring up an app chooser. You can select your new home screen and tap Just onceto use it once, or tap Always to make it your new default home screen that appears whenever you tap the Home button.
android-select-default-launcher[4]
You’ll see this option again whenever you install a new custom launcher, allowing you to select your preferred app.
To get the default launcher back, go into the Settings screen, tap Apps, tap your current launcher in the list of installed apps, and tap the Clear defaults button.
android-reset-default-launcher

Example Home Screen Replacements

Here are a few of the more interesting third-party launchers available for Android:
  • Facebook Home – Facebook Home is very different from most home screen replacements. Most custom home screen replacements are for tweakers and replace Android’s home screen with an interface supporting many more options and themes. In contrast, Facebook Home goes a different direction and replaces your device’s home screen with content from your Facebook friends. It’s a good example of just how flexible Android’s interface is, and we may see more interfaces like it from other developers — Twitter has recently indicated a possible interest in releasing its own home screen replacement for Android.
  • Nova Launcher – Nova Launcher supports Android 4.0 and above. It looks similar to Android’s default launcher, but adds a variety of additional options and effects, including the ability to use themes and create custom tabs to categorize the apps in your app drawer. Because it’s so similar to the default interface, it can be installed on a Samsung, HTC, or other manufacturers’ device and set as the default launcher, replacing the manufacturer’s Android skin with a a more stock Android-like experience.
  • Holo Launcher – Holo Launcher works like Android 4.0’s default interface, but it also works on Android 2.2 and above. Holo Launcher can be used to get a more modern-looking home screen on devices running older versions of Android, making an old Android feel like new.
  • GO Launcher EX – GO Launcher EX supports over 5000 themes and its own GO widgets, as well as many included effects and options. If you want something that looks a bit different, you may want to give this a try.
  • Launcher 8 – Launcher 8 offers a Windows Phone 8-like layout for your home screen. It’s another good example of Android’s flexibility, although it won’t be as slick and integrated as a real Windows Phone experience.
launcher-8-on-android

Facebook also recently introduced “chat heads,” floating chat windows that appear above any other app you’re currently using. However, chat heads aren’t the only floating app available for Android. We’ve covered a variety of floating apps you can use on any Android device for everything from chatting to taking notes, browsing the web, and watching videos.
Read More

How to Set Default Apps on Android


IMG_8822
When you have multiple applications that do the same thing—like browsers, for example—Android will ask you which one you want to use every time, at least until you set one as the default with the “always” action. In the earlier days of the app picker, you’d have to clear defaults for each one before applying another, but things have changed.
Now, there’s a simple way to manage default applications for the most-used apps all in one place. The only problem is that it’s in a different place for every major manufacturer. Just Android things, right?
The good news is that getting to where you need to be starts in the same place on basically every Android device out here: Settings. Just pull down the notification panel, and hit the cog icon to jump in.
Screenshot_20160628-205140 Screenshot_2016-06-28-21-45-46
Once in Settings, you’ll need to find the Apps section for your particular manufacturer. On most devices, it’s just labeled “Apps” or “Manage Apps,” with the main exception being Samsung Galaxy handsets—you’ll be looking for “Applications.” Silly Samsung, being all formal. On LG devices, you’ll find “Apps” under the “General” tab.
Screenshot_20160628-205149 Screenshot_20160628-204829 Screenshot_2016-06-28-20-46-40
From here, things can get a little sketchy between brands. On Stock Marshmallow devices, just hit the cog icon in the top right corner, then “Default Apps.” This changes in Android N, as there is no “Default Apps” option—instead, everything is managed from the main app settings screen. On Galaxy devices, the second option to the top is “Default applications,” which is the one you want.
Screenshot_20160628-205154 Screenshot_20160628-204838
On LG handsets, hit the overflow button in the top right corner, then “Configure apps.” On Huawei phones, tap “Default app settings” at the bottom of the screen.
Screenshot_2016-06-28-20-46-58 Screenshot_2016-06-28-20-50-00
At this point, most handset makers should be pretty much on the same page. The majority will let you change the default launcher (Home), browser, dialer (phone), and SMS apps, along with some particulars that will vary between manufacturers.
Screenshot_20160628-204846 Screenshot_2016-06-28-20-58-06 Screenshot_2016-06-28-20-50-07

It’s worth mentioning here that whenever you install a new app that can be set as a default—like a launcher or browser—this will effectively reset your default preference for that category, allowing you to set the newly-installed app as default without having to go through much hassle. If you want to change it back, just following these instructions. Simple.
Read More

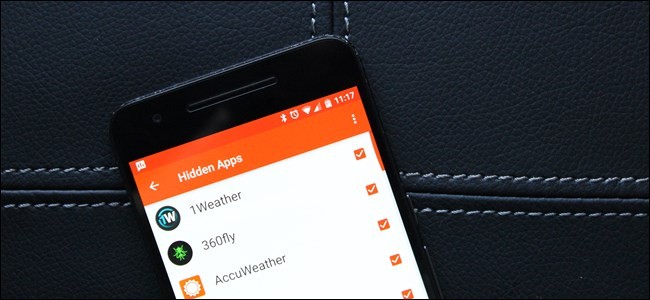
How to Hide Apps from Android’s App Drawer with Nova Launcher


IMG_8113
Not every app deserves a spot in your app drawer. Maybe there are some built-in apps you don’t use, or a few you don’t want others to see. Here’s how to hide apps from your app drawer with Nova Launcher.
Of course, you can always uninstall apps you don’t want–even if they’re “uninstallable” bloatware. This is more for apps you use in the background, or want on your phone, but don’t want to see cluttering up your list of icons

How to Hide Apps In Nova Launcher

If you already have Nova Launcher installed and set up, hiding apps in the drawer is incredibly simple. Note that you’ll need Nova Launcher Prime ($4.99) for this feature. This will only hide apps in the drawer, so you can still put the app on your home screen before hiding it in the drawer and quickly launch it from there if you want.
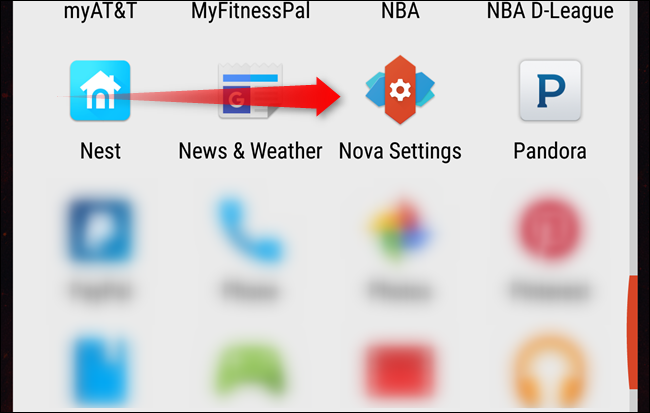
First, jump into Nova’s settings menu, by either long-pressing on the home screen and selecting the “Settings” icon in the bottom right, or heading into the app drawer and tapping the “Nova Settings” icon.
Screenshot_20160331-102336 Screenshot_20160331-102326
From there, tap the second entry in the menu—”App & widget drawers.”
Screenshot_20160331-112639
There are several options here, but you’re going to want to scroll all the way to the bottom. In the “Drawer groups” section, select the “Hide apps” option.
Screenshot_20160331-102502
Then, select all the apps that you’d like to hide by ticking the check box next to the app’s name.
Once you’ve finished selecting all the apps you’d like to hide, either back out of this menu with the arrow in the upper left, or just hit the home button to go back to the home screen.
Screenshot_20160331-102614
You’re done—all the selected apps will no longer be visible in the app drawer.

How to Access Apps Once They’re Hidden

If you don’t have the app icon on any of you home screens, then you’re probably wondering what to do if you need to access it. You could jump back into the above menu and unhide the app, but that’s cumbersome. Fortunately, there are a couple of ways to launch an app once it’s been hidden.

Access a Hidden App from the Search Bar

If you’re using the Android Marshmallow-style app drawer in Nova, pulling down while in the drawer will launch the search bar and “Recently install or updated” app menu. Even though the app icon isn’t shown in the drawer, you can search for the app and launch it that way. Easy peasy.
Screenshot_20160331-103305

Access All Your Hidden Apps at Once

If you’d prefer a way to show all your hidden apps, there’s also a quick and painless way to do that—but you’ll need to enable Nova’s tabbed app drawer interface first.
To do this, jump back into Nova’s Settings menu, then tap the “App & widget drawers” option again.
Scroll about three-quarters of the way down the menu, till you see the “Tab bar” section. Enable the Tab bar by sliding the toggle to the right. It turns orange when it’s activated; gray when it’s not.
Screenshot_20160331-104029
You can also change the Tab Style here using the entry just below the Tab Bar option—the default should be “Colorblock,” but I generally opt to swap that to “Material,” just because it looks cleaner and more minimal.
Screenshot_20160331-104039
Once the Tab Bar has been enabled, you can exit this menu and head back to the home screen.
Back in the app drawer, you’ll notice a new feature at the top: a tab that should read “Apps.” If you long-press this tab, a small menu will appear with two options: “Show hidden apps” and “edit.”
Screenshot_20160331-104008
Toggle the “Show hidden apps” option to instantly make your hidden apps visible. A small asterisk will appear next to the word “Apps” to denote that hidden apps are currently being shown.
Screenshot_20160331-104014
Repeat the same process to hide your apps again, this time unticking the check box.

It’s worth mentioning that this shouldn’t be used as a method of security. There are still very simple ways to access hidden apps (not limited to the methods mentioned here), so this isn’t really a proper solution to keeping private data safe. But it’s a great way to reduce clutter or hide icons you don’t want to see.
Read More

10 Android Tweaks That Still Require Root


Many features that once required root have been added to Android over the years. However, many advanced tricks still require rooting your Android smartphone or tablet.
In an ideal world, you wouldn’t have to root — rooting reduces your device’s security. That’s part of why CyanogenMod’s founder is looking at adding additional features to Cyanogenmod that would eliminate the need for root.

Back Up and Restore App Data

The popular Titanium Backup app, which allows you to back up an app’s data and then restore it later, requires root access. Android apps aren’t supposed to be able to read other apps’ data — that’s a security vulnerability — so this still requires root access. Much Android data is automatically backed up, but Titanium Backup allows users to back up everything and easily restore it, even data that wouldn’t normally be backed up.
Android includes some built-in backup features, but they’re hidden — you have to access them by plugging your device into a computer and running a special command. While the built-in backup features are so hidden and not all app data is backed up to the cloud, Titanium Backup is still very useful.

Change Your DNS Server

Want to change your Android phone’s DNS server and use a third-party DNS server like Google Public DNS for possibly improved speed, OpenDNS for web filtering, or Tunlr for easy access to geoblocked online media services?
Android doesn’t make this easy. You can change the DNS server for each individual Wi-Fi network you connect to, but you can’t set a preferred DNS server system-wide. This requires a third-party app like SetDNS. Sure, you could just change the DNS server on your router and you’d be okay when you were at home, but this wouldn’t help you when you were out and about. Android make this possible without rooting, but it’s extremely tedious.

Remove Bloatware Completely

Android now provides a way to disable apps that were preinstalled by the carrier or device’s manufacturer. However, they’ll just be disabled — so they’ll still take up space on the device’s storage. With root access, you can delete the applications from the system partition, recovering the wasted storage and gaining the ability to use it for other things.
This isn’t necessarily recommended, as it can cause problems if you remove apps that the device needs. That’s why disabling bloatware apps is generally a better idea — but that’s little comfort if you don’t have much storage space left and you want to recover space wasted by bloatware.

Gain Low-Level Hardware Access

After rooting your device, you can install a custom Linux kernel on it. This enables you to access features that require kernel-level changes. For example, Nexus 4 users can install the Touch Control app to wake their smartphones with a simple swipe on the display rather than a press often power button. This is implemented as a kernel module because it requires that low-level access.
Other commonly used features that often require custom kernels include display calibration, CPU downclocking (for more battery life), and CPU overclocking (for more performance.)

Manage App Permissions

When you install an app, Android shows you the permissions the app requires. This is a take-it-or-leave-it offer — if you want to install a game but that game requires an obscene level of permissions, you can’t just deny individual permissions.
Root access allows you more control over app permissions on your phone, as this feature isn’t available to typical users. The good news is that Android 4.3 includes a hidden permissions manager named “App ops.” This feature likely isn’t stable and shouldn’t be relied on yet, but it’s hopefully a sign of things to come — with any luck, we’ll see a stable permission manager introduced in Android 4.4.
android-app-ops

Mount USB Sticks

It’s possible to connect a USB stick to your Android tablet using a standard USB OTG cable. However, Android doesn’t support USB sticks natively. If you’d like to connect a USB stick to your tablet so you can watch videos without wasting all your tablet’s storage, you’ll need root access and something like the StickMount app. This utility makes files on USB sticks available on the Android device’s file system so other apps can access them, but it requires low-level access available only to root users.

Get Full File System Access

Root gives you full access to the system by definition, so it’s no coincidence that people who want full read/write access to the entire file system will require root. Root allows you to use file managers that can access the entire file system and even edit Android’s configuration files by hand in text editors — something hardcore Android tweakers may find useful.

Automate More Things

We’ve previously covered Tasker, an advanced application that lets you automate your Android device. Tasker allows you to make things automatically happen when certain conditions are met. However, some features you can change yourself require root access when controlled by an application. If you want to enable or disable airplane mode, connect or disconnect VPNs, or do other advanced things that Android doesn’t allow apps to do, you’ll need to give Tasker root access.

Stream To Apple AirPlay Devices

The AirAudio app makes Android devices AirPlay-compatible, allowing you to stream audio from your device to an AirPlay-enabled receiver like an Apple TV. AirAudio does this by capturing the audio data coming from an application and sending it over the network. Android doesn’t normally allow apps to listen to other app’s audio signals, so AirAudio requires root access to do its thing.
This is an example of the sort of unforeseen app that’s only possible because root allows the app to break out of Android’s security model.

Adblock

We’re obviously an ad-supported website, so we generally don’t jump up and down telling everyone how to disable ads. However, it’s impossible to deny — one big reason many people root their devices is to block ads at the system level.
Many Android apps are free specifically because they contain ads, so using a trick to disable advertisements in the app when you could just spend $0.99 for the full, ad-free app isn’t very nice to developers. Don’t expect Google to make this feature stop requiring root anytime soon.

This isn’t a comprehensive list, but it gives you an idea of some of the most common reasons for rooting. Wi-Fi tethering doesn’t necessarily require rooting anymore, either — even if the carrier has disabled the built-in tethering features, most devices can use Wi-Fi tethering via the FoxFi app.
Read More

The Case Against Root: Why Android Devices Don’t Come Rooted


image
We’ve written about rooting your Android smartphones and tablets before, but why don’t they come rooted? Google argues that rooting is a mistake for security reasons, as it subverts Android’s security model.
Over the years, Google has added more and more formerly root-only features to Android – from screenshots to support for encryption and VPNs. The goal is to minimize the need for rooting.

What is Rooting, Anyway?

Android is based on Linux, where the “root” user is equivalent to the Administrator user in Windows. The term “rooting” means gaining root access to your smartphone or tablet and being able to run applications with that root permissions – full system access, in other words.
A standard rooting process will also an application like Superuser or SuperSU. This application supervises access to root. Applications on your device can’t just get root permissions whenever they want – they have to prompt you and you can confirm or deny the request.
image

Breaking Out of Android’s Security Model

Android uses Linux’s security model in a different way. Every Android app runs with its own user ID, or UID. In other words, every app runs as its own user account. This means that every app has its own data isolated from every other app. If you install your bank’s app, its data will be stored so that it’s only accessible by the bank’s app – other apps on your device can’t snoop on it.
On a standard Android configuration, no app can access any other app’s data, no matter how many permissions the app asks for.
This all changes when you run an application as root. The application is no longer running in a sandboxed area – it has access to the entire system. An app with root permissions can read other apps’ data – this is how the excellent Titanium Backup works and why it requires root.

Root Permission Prompts and Malware

The full system access means that malware could potentially exploit root access to do much more damage than it normally could. Once an app is granted root access, it can do anything – run a key logger in the background without telling you, extract your account information from other apps, or even mess up your device by deleting critical system files.
If you know what you’re doing and only download trusted root apps, you can avoid this. However, this is worth remembering when you consider how many less-technical users use Android. They don’t care about running Titanium Backup and having access to the entire root file system – they just want it to work, place phone calls, and play Angry Birds.
In other words, you probably shouldn’t root your relatives’ smartphones and tablets as a favor to them.
image

With Great Power Comes Great Responsibility

The problems don’t only extend to malware. With full access to the root file system, you can delete critical system files in the root file system or disable critical system apps and prevent your device from functioning properly. Windows goes to great pains to prevent average users from mucking around in the C:\Windows folder for the same reason. If the average user doesn’t understand what they’re doing, they can do serious damage to their operating system.
image

Warranty Considerations

Some manufacturers or carriers may try to refuse you warranty service if you have a rooted device. If you’ve used root access to modify your system files and the software no longer works properly, this makes some sense – although you should be able to restore the device to its factory default settings and fix it on your own.
If the device’s hardware is failing, rooting can’t be the cause (unless you’ve installed an overclocking app that required root and killed the hardware with heat). To prevent any arguments, you should unroot the device before taking it in for service.
This is yet another reason why you wouldn’t want to root a non-technical family member’s device – it may cause them problems if they ever need it fixed or replaced.

In summary, rooting grants you great power – more power than Android is designed to give you. (However, it’s Linux underneath, and Linux works just fine with root access.) An app with root access isn’t bound by any permission restrictions and has the potential to cause some serious problems. If you know what you’re doing, you should be okay – but you’ll need to be more careful.
However, this power is only a liability for the average Android user. This is why Android doesn’t come rooted – if any app could pop up a root permission prompt and gain complete access to the system, many less-technical users would allow the access so they can continue using the app. Some apps might even refuse to run without root access just to display nastier ads, just as many ad-supported apps ask for a long list of permissions today. The lack of root helps protect average users.
Read More

SafetyNet Explained: Why Android Pay and Other Apps Don’t Work on Rooted Devices

rooting android phone
Rooting your Android device gives you access to a wider variety of apps and a deeper access to the Android system. But some apps–like Google’s Android Pay–won’t work at all on a rooted device.
Google uses something called SafetyNet to detect whether your device is rooted or not, and blocks access to those features. Google isn’t the only one, either–plenty of third-party apps also won’t work on rooted Android devices, although they may check for the presence of root in other ways.

SafetyNet: How Google Knows You’ve Rooted Your Android Phone

Android devices offer a “SafetyNet API,” which is part of the Google Play Services layer installed on Google-approved Android devices. This API “provides access to Google services that help you assess the health and safety of an Android device,” according to Google. If you’re an Android developer, you can call this API in your app to check whether the device you’re running on has been tampered with.
This SafetyNet API is designed to check whether a device has been tampered with–whether it’s been rooted by a user, is running a custom ROM, or has been infected with low-level malware, for example.
Devices that ship with Google’s Play Store and other apps installed must pass Google’s Android “Compatibility Test Suite”. Rooting a device or installing a custom ROM prevents a device from being “CTS Compatible”. This is how the SafetyNet API can tell if you’re rooted–it merely checks for CTS compatibility. Similarly, if you get an Android device that never came with Google’s apps–like one of those $20 tablets shipped direct from a factory in China–it won’t be considered “CTS compatible” at all, even if you haven’t rooted it.
To get this information, Google Play Services downloads a program named “snet” and runs it in the background on your device. The program collects data from your device and sends it to Google regularly. Google uses this information for a variety of purposes, from getting a picture of the wider Android ecosystem to determining whether or not your device’s software has been tampered with. Google doesn’t explain exactly what snet is looking for, but it’s likely snet checks if your system partition has been modified from the factory state.
You can check the SafetyNet status of your device by downloading an app like SafetyNet Helper Sample or SafetyNet Playground. The app will ask Google’s SafetyNet service about your device’s status and tell you the response it gets from Google’s server.

It’s Up to the App

SafetyNet is optional for app developers, and app developers can choose to use it or not. SafetyNet only prevents an app from working if an app’s developer doesn’t want it to work on rooted devices.
Most apps won’t check the SafetyNet API at all. Even an app that does check the SafetyNet API–like the test apps above–won’t stop working if they receive a bad response. The app’s developer has to check the SafetyNet API and make the app refuse to function if it learns your device’s software has been modified. Google’s own Android Pay app is a good example of this in action.

Android Pay Won’t Work on Rooted Devices

Google’s Android Pay mobile payment solution doesn’t work at all on rooted Android devices. Try to launch it, and you’ll just see a message saying “Android Pay cannot be used. Google is unable to verify that your device or the software running on it is Android compatible.”
It’s not just about rooting, of course–running a custom ROM would also put you afoul of this requirement. The SafetyNet API will claim it’s not “Android compatible” if you’re using a custom ROM the device didn’t come with.
Remember, this doesn’t just detect rooting. If your device were infected by some system-level malware with the ability to spy on Android Pay and other apps, the SafetyNet API would also prevent Android Pay from functioning, which is a good thing.
Rooting your device breaks Android’s normal security model. Android Pay normally protects your payment data using Android’s sandboxing features, but apps can break out of the sandbox on a rooted device. Google has no way to know how secure Android Pay would be on a particular device if it’s rooted or running an unknown custom ROM, so they block it. An Android Pay engineer explained the problem on the XDA Developers forum if you’re curious to read more.

Other Ways Apps Can Detect Root

SafetyNet is just one way an app could check if it’s running on a rooted device. For example, Samsung devices include a security system named KNOX. If you root your device, KNOX security is tripped. Samsung Pay, Samsung’s own mobile-payments app, will refuse to function on rooted devices. Samsung is using KNOX for this, but it could just as well use SafetyNet.
Similarly, plenty of third-party apps will block you from using them, and not all of them use SafetyNet. They may just check for the presence of known root apps and processes on a device.
It’s tough to find an up-to-date list of apps that don’t work when a device is rooted. However, RootCloak provides several lists. These lists may be out-of-date, but they’re the best ones we can find. Many are banking and other mobile wallet apps, which block access on rooted phones in an attempt to protect your banking information from being captured by other apps. Apps for video streaming services may also refuse to function on a rooted device as a sort of DRM measure, attempting to prevent you from recording a protected video stream.

Some Apps Can Be Tricked

Google’s playing a cat-and-mouse game with SafetyNet, constantly updating it in an attempt to stay ahead of people getting around it. For example, Android developer Chainfire has created a new method of rooting Android devices without modifying the system partition, known as “systemless root”. SafetyNet initially didn’t detect such devices as being tampered with, and Android Pay worked–but SafetyNet was eventually updated to detect this new rooting method. This means Android Pay no longer works along with systemless root.
Depending on how an app checks for root access, you may be able to trick it. For example, there are reportedly methods to root some Samsung devices without tripping the KNOX security, which would allow you to continue using Samsung Pay.
In the case of apps that just check for root apps on your system, there’s an Xposed Framework module named RootCloak that reportedly allows you to trick them into working anyway. This works with apps like DirecTV GenieGo, Best Buy CinemaNow, and Movies by Flixster, which don’t normally work on rooted devices. However, if these apps were updated to use Google’s SafetyNet, they wouldn’t be so easy to trick in this way.

Most apps will continue working normally once you’ve rooted your device. Mobile payment apps are the big exception, as are some other banking and financial apps. Paid video-streaming services sometimes attempt to block you from watching their videos as well.
If an app you need doesn’t function on your rooted device, you can always unroot your device to use it. The app should work after you’ve returned your device to its secure, factory state
Read More

Tuesday, 10 April 2018

8 Reasons to Install LineageOS on Your Android Device

CyanogenMod was formerly the most popular custom ROM for Android devices. Unfortunately, a short-lived effort at making the ROM the basis of a business-to-business software company sank the entire CyanogenMod team and its former assets, including the name and community servers. But all isn’t lost: many of the original developers have jumped into the new LineageOS project—a direct follow-up to CyanogenMod. While the extensive device support isn’t quite what it used to be, Lineage is still the first stop for up-to-date community ROMs for many users.
Up-to-Date, Stock Android
LineageOS provides you with an up-to-date version of Android. It’s also a pure, stock Android experience. Yes, the Lineage developers add lots of their own tweaks and a handful of apps. However, they respect Google’s interface. The tweaks the operating system adds don’t feel out of place—many of them are just added to the Settings screen as new options. Because it dispenses with the additional bloat a lot of manufacturers and carriers add, LineageOS is also very fast.
This is the biggest reason to install a custom ROM. If it supports your device, it will provide you with a pure, up-to-date Android experience. It’s a way to revitalize old Android devices that manufacturers are no longer updating.

Privacy Guard

Privacy Guard lets you control which permissions installed apps can use, and which permissions new apps get by default. This gives you an iOS-style permission experience on Android, so you can decide whether that app should be allowed to access your location, contacts, and other private data while still using the app. This is based on an Android feature named App Ops to which Google removed access.
Privacy Guard also displays a notification when you’re using an app with blocked permissions. If an app isn’t working properly, this notification reminds you that you may want to re-enable some permissions. You can enable Privacy Guard and control notifications by heading to Settings > Privacy > Privacy Guard.

SuperUser

cyanogenmod-superuser-root-access-settings
The “Superuser” screen integrates root permissions into Android’s Settings screen. This interface functions as a traditional way to allow and disallow superuser requests from apps, but it also allows you to enable or disable root for your entire device. You don’t have to connect your phone or tablet to your computer and run any commands, and you won’t lose root when upgrading. LineageOS is compatible with root access if you want it, and allows you to disable root access if you don’t need it.

Interface Tweaks

The “Interface” settings screen is packed with options. You can tweak the Status Bar, Quick Settings panel, Notification Drawer, and Navigation Bar. For example, you could reorder the buttons on the Navigation Bar at the bottom of your screen, or rearrange the order of the tiles in the Quick Settings panel.
The Status Bar pane has a Brightness control toggle, which allows you to adjust your device’s screen brightness just by sliding your finger back and forth on the notification panel at the top of your screen. It’s a great way to increase screen brightness if you can’t see your screen in direct sunlight, for example.

Equalizer

The AudioFX app provides system-wide equalizer controls you can use to adjust the sound coming from your device, enabling bass boost, activating an equalizer, and selecting presets that match the music you listen to.

Button Options

Use the “Buttons” screen to control what your device’s buttons do. For example, you could long-press the volume buttons to switch music tracks. This is a great solution for skipping between songs without pulling your phone out of your pocket, if you don’t have a headphone cable with an integrated remote.
LineageOS even includes the ability to enable keyboard cursor control, so that your volume keys move the text cursor when your software keyboard is open. This could make typing more efficient, allowing you to adjust the cursor without having to move your finger a pixel to the left or right on the touchscreen.

Profiles

LineageOS includes profiles, which you can find under Settings > Users or by long-pressing the power button, and then tapping the “Profile” option. Profiles are groups of settings. For example, say you always set your phone to vibrate mode and disable mobile data when you’re at work. You could group those settings into a “Work” profile and just switch to the profile instead of changing each individual setting. You can also activate profiles using Tasker.
LineageOS also includes a handful of its own apps, like the Trebuchet home screen launcher, the clock home screen widget, a File Manager with root file access, a custom music player, and a terminal emulator. You can also install many of these apps on other Android devices, and you can all be replace them with other apps you may like better.
Read More